“What if you could grow fresh, nutritious greens at home without a garden?”
Microgreens are young, nutrient-rich greens harvested within 7–21 days. Learn how to grow them from seed to harvest using simple methods, minimal space, and basic materials at home.
Microgreens Cultivation: A Simple Guide from Seed to Harvest
Microgreens are young, edible plants harvested soon after germination, usually within 7–21 days. They are more mature than sprouts but younger than baby greens. Because they grow quickly and require very little space, microgreens are ideal for home gardens, balconies, cafés, restaurants, and urban farms.
What Are Microgreens?
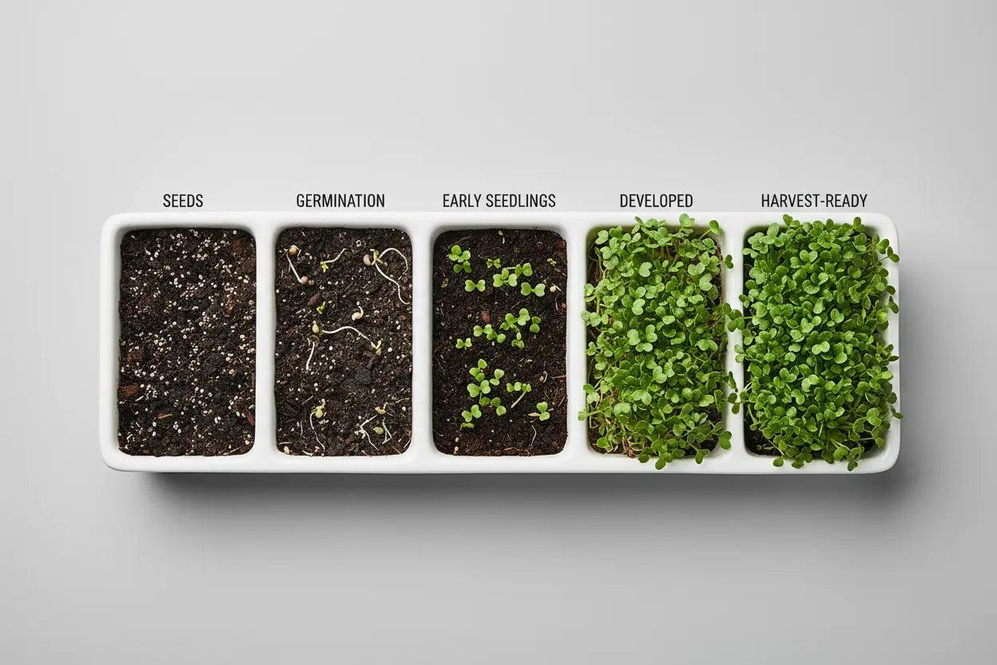
Microgreens are harvested when their cotyledon leaves are open and the first true leaves begin to appear. Only the stems and leaves are consumed, while the roots remain in the growing medium.
They are commonly added to:
- Salads and sandwiches.
- Soups and rice dishes.
- Smoothies and healthy meals.
- Restaurant and café dishes as garnish.
Microgreens are valued for their fresh flavor, attractive colors, crisp texture, and short growing cycle.
Popular Microgreen Seeds
Beginners can start with fast-growing and easy-to-manage varieties such as:
- Radish: Spicy flavor and quick growth.
- Mustard: Strong, peppery taste.
- Sunflower: Crunchy texture and nutty flavor.
- Pea shoots: Sweet, tender, and popular in salads.
- Broccoli: Mild flavor and rich in plant compounds.
- Amaranth: Attractive red color and delicate texture.
- Coriander and basil: Fragrant varieties that are suitable for advanced growers.
Always use untreated, food-safe seeds. Agricultural seeds coated with chemicals or fungicides should not be used for growing edible microgreens.
Health Benefits
Microgreens can add valuable nutrients and flavor to everyday meals. Depending on the variety, they may contain vitamins A, C, E, and K, along with minerals such as iron, calcium, magnesium, and zinc.
They also contain antioxidants and other plant compounds that help protect cells from oxidative stress. Broccoli, radish, mustard, and amaranth microgreens are especially popular among health-conscious consumers.
Microgreens should be considered a nutritious addition to a balanced diet rather than a replacement for mature vegetables.
How to Grow Microgreens
1. Choose the Right Tray
Use shallow, food-grade trays. A standard 10 × 20-inch tray is commonly used for home and commercial cultivation.
A tray with drainage holes can be placed above a second tray without holes. The lower tray collects water and allows bottom watering.
2. Prepare the Growing Medium
Cocopeat is a popular growing medium because it is lightweight, clean, and able to retain moisture while allowing airflow. Soil mixes and hydroponic mats can also be used.
Fill the tray evenly with the medium and lightly press it to create a stable surface for the seeds.
3. Sow the Seeds
Spread the seeds evenly across the tray. Large seeds such as sunflower and pea are usually soaked for several hours before sowing to improve germination.
Mist the seeds lightly and cover the tray or stack another tray on top. This creates the dark, humid conditions needed during germination.
4. Blackout and Germination
During the blackout period, seeds begin to develop roots and shoots. Depending on the variety, this stage generally lasts two to five days.
Keep the medium moist, but avoid excessive watering. Once the seedlings are strong enough and have reached a suitable height, move the tray under natural sunlight or LED grow lights.
5. Provide Light and Airflow
Microgreens generally need around 10–14 hours of light each day. LED grow lights are useful for indoor cultivation because they provide consistent lighting and produce less heat than many traditional lights.
Gentle airflow from a small fan helps control humidity, strengthen stems, and reduce the risk of mold. Avoid directing strong wind directly at the seedlings.
6. Water Correctly
Bottom watering is usually preferred. Add water to the lower tray and allow the growing medium to absorb it through the drainage holes.
The medium should remain moist but never waterlogged. Overwatering can cause mold and root problems, while underwatering may produce weak or dry plants.
When to Harvest
Most microgreens are ready to harvest within 7–21 days, depending on the variety and growing conditions. They are usually cut when the cotyledon leaves are fully open and the first true leaves begin to appear.
A crop is often ready when it reaches approximately 2–3 inches in height. Sunflower and pea shoots may be harvested slightly taller.
Use clean, sharp scissors to cut the greens just above the growing medium. Harvesting in the morning can help preserve freshness.
Essential Growing Tips
- Use clean, food-grade trays and tools.
- Choose untreated, high-germination seeds.
- Keep the growing medium moist, not wet.
- Provide adequate light every day.
- Maintain good ventilation around the trays.
- Avoid overcrowding trays.
- Remove mold-affected crops immediately.
- Harvest with clean scissors and washed hands.
- Dry the greens properly before storage.
- Store harvested microgreens in a refrigerator and use them within a few days for the best quality.
Start Growing at Home
Microgreens are one of the simplest crops to grow indoors. With a shallow tray, quality seeds, cocopeat, water, and adequate light, you can produce fresh greens in a small space within a few weeks.
Start with radish, mustard, sunflower, or pea shoots, and gradually experiment with other varieties as you gain experience.

Swathi Malairaj
Swathi M Trainee – Content Creator, Waytoogreen Pvt. Ltd. B.Sc. (Hons) Agriculture graduate with a focus on landscaping and hydroponics. 1 week trained at Prajaa Juice Industry, Theni, gaining hands-on exposure to Agri-processing. Now creates engaging, research-backed content on agriculture at Waytoogreen.
No comments yet. Login to start a new discussion Start a new discussion